Risk-reward ratio might be the most important metric in trading that most traders ignore. It's the reason some traders with 40% win rates are profitable while others with 70% win rates go broke. Your risk-reward ratio determines what win rate you actually need to be profitable. This article teaches you how to calculate it, why 1:2 minimum matters, and how it changes your long-term profitability.
What Is Risk-Reward Ratio
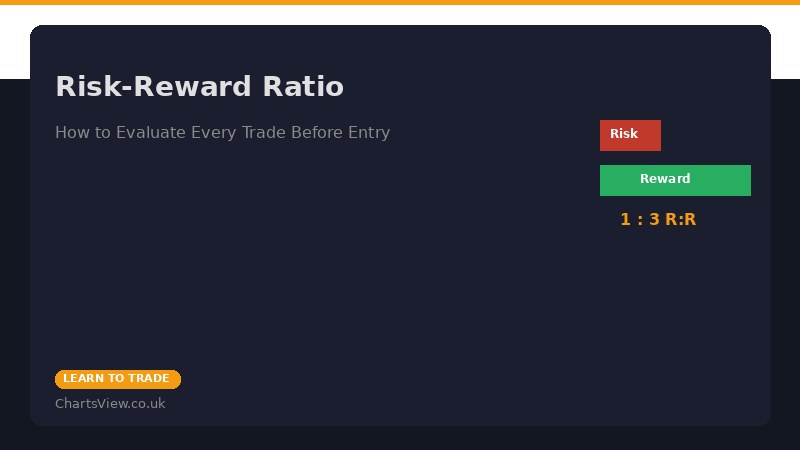
Risk-reward ratio is the relationship between how much you can lose on a trade and how much you can make. It's expressed as a ratio, usually written as R:R or written out as "risk to reward."
Simple example: You buy a stock at 500p. You set your stop loss at 480p (you can lose 20p). You set your profit target at 540p (you can make 40p). Your risk-reward ratio is 20:40, which simplifies to 1:2. For every 1 unit you risk, you have the potential to make 2 units.
Another example: You buy HSBA at 820p with a stop at 810p (10p risk) and a target at 840p (20p profit). That's 10:20, or 1:2.
A bad example: You buy something at 500p, your stop is at 490p (10p risk), and you hope to make 15p on it. That's 10:15, or approximately 1:1.5. This is not good enough for consistent profitability.
An excellent example: You buy at 500p, stop at 475p (25p risk), target at 575p (75p profit). That's 25:75, or 1:3. Fantastic risk-reward.
How to Calculate Risk-Reward for Any Trade Setup
The calculation is dead simple.
Risk = Entry price - Stop loss price
Reward = Target price - Entry price
Ratio = Risk : Reward (often simplified)
Real Example: ULVR Long Trade
You identify Unilever (ULVR) about to break above resistance at 4,250p. You plan to enter on the breakout at 4,260p. You identify support at 4,200p, so you'll place your stop at 4,195p (slight buffer). You identify the next resistance at 4,350p, so you'll take profit at 4,340p.
Risk = 4,260p - 4,195p = 65p
Reward = 4,340p - 4,260p = 80p
Ratio = 65:80 = 1:1.23
This is a mediocre risk-reward. You're risking £0.65 to make £0.80. Not great. You might want to look for a better target, or move up your entry to a better risk-reward level.
Revised Example: Same Trade, Better Target
Instead of taking profit at 4,340p (the immediate resistance), you identify a higher resistance at 4,450p. You revise your target.
Risk = 4,260p - 4,195p = 65p
Reward = 4,450p - 4,260p = 190p
Ratio = 65:190 = 1:2.92
Much better. Now you're risking 65p to potentially make 190p. This is a strong risk-reward ratio.
Short Trade Example: SHELL Short
You spot SHEL breaking below support at 2,280p. You plan to short the breakdown at 2,275p. You place your stop above resistance at 2,320p (your stop is at 2,325p). You target the next support at 2,150p.
Risk = 2,325p - 2,275p = 50p (on shorts, the stop is above)
Reward = 2,275p - 2,150p = 125p
Ratio = 50:125 = 1:2.5
Solid risk-reward on a short trade.
Why 1:2 Minimum Matters
Why does the trading world always talk about 1:2 as a minimum? Because the maths work out.
Let's say you're a mediocre trader with a 50% win rate. Half your trades win, half lose. With a 1:2 risk-reward ratio:
- Win 5 trades: +5 R (5 × 2 risk units gained)
- Lose 5 trades: -5 R (5 × 1 risk unit lost)
- Net: +10 R - 5 R = +5 R profit
You're profitable with a 50% win rate. Most traders aim to be better than 50%, so a 1:2 minimum gives you a safety margin.
Now let's see what happens with a poor 1:1 risk-reward ratio:
- Win 5 trades: +5 R
- Lose 5 trades: -5 R
- Net: +5 R - 5 R = 0 (breakeven)
With 1:1 ratio, you need better than 50% win rate just to breakeven. You need 55%+ to actually profit. And if your win rate is 50%, you lose money.
This is why professional traders obsess over risk-reward. A slightly better risk-reward ratio means you can be less accurate on your entries and still be profitable. It's the great equalizer.
Win Rate vs Risk-Reward Breakeven Table
Here's the mathematical reality. For any given win rate, this is the minimum risk-reward ratio you need to break even (not profit, just break even):
| Win Rate | Required R:R to Break Even | Realistic Profitable R:R |
|---|---|---|
| 30% | 1:2.33 | 1:3+ |
| 40% | 1:1.5 | 1:2+ |
| 50% | 1:1 | 1:1.5+ |
| 60% | 0.67:1 | 1:1 |
| 70% | 0.43:1 | 0.67:1 |
Look at the 40% win rate row. If you're right only 40% of the time (which is actually pretty good), you still break even if your risk-reward is 1:1.5. And you'll be profitable with 1:2.
Compare this to a 70% win rate. Even with accurate entries, if your risk-reward is only 0.67:1 (meaning you're risking more than you make), you'll just break even.
This table shows something counterintuitive but true: you can be more accurate and still lose money (if your R:R is bad). Or you can be less accurate and still make money (if your R:R is good). The ratio matters more than the accuracy.
How Risk-Reward Changes Your Profitability: A Real Example
Let's compare two traders over 100 trades:
Trader A: 50% Win Rate, 1:1 Risk-Reward
- 50 wins at +1 unit each = +50 units
- 50 losses at -1 unit each = -50 units
- Total: 0 units (breakeven)
Trader B: 50% Win Rate, 1:2 Risk-Reward
- 50 wins at +2 units each = +100 units
- 50 losses at -1 unit each = -50 units
- Total: +50 units (profitable)
Same accuracy. Same number of trades. Trader B is up 50 units while Trader A breaks even. The only difference is risk-reward.
Trader C: 40% Win Rate, 1:2 Risk-Reward
- 40 wins at +2 units each = +80 units
- 60 losses at -1 unit each = -60 units
- Total: +20 units (profitable)
Trader C is less accurate than Traders A and B (40% vs 50%), yet is profitable because of superior risk-reward. Over 100 trades, Trader C makes +20 units while Trader A makes zero.
This is the power of risk-reward ratio. It compensates for lower accuracy. Professional traders would rather have 40% accuracy and 1:3 R:R than 60% accuracy and 1:0.5 R:R.
Setting Your Profit Targets Using Technical Levels
You now understand why good risk-reward matters. But where do you actually place your profit target? You can't just wish for 1:2 ratio—price has to cooperate.
Method 1: Previous Resistance Levels
The simplest method: find where price previously struggled to break above. That's your target.
Example: HSBA is in an uptrend. Current price is 820p. Previous resistance is at 840p, and before that at 860p. You decide to target 840p for this trade. This is logical—price has been rejected at 840p before.
Method 2: Fibonacci Retracements
Using Fibonacci levels can help you find statistically meaningful targets. If HSBA rallied from 750p to 900p (a 150p move), a 50% retracement target would be 825p. A full retracement would be 750p.
These levels aren't magical, but they often act as support/resistance because so many traders watch them.
Method 3: Measured Moves
If price moved from point A to point B, it often moves the same distance from point B to point C. This is a "measured move."
Example: ULVR rallied from 4,000p to 4,100p (100p move). It pulled back to 4,080p. A measured move would target 4,080p + 100p = 4,180p.
Method 4: Swing High (For Breakout Trades)
You're trading a breakout above resistance. Your next target should logically be the next resistance above current price.
If SHELL breaks above 2,300p, and the next resistance is at 2,350p and then 2,400p, you target those levels in order.
Method 5: Fixed Multiples of Your Risk
Some traders simply take their risk amount and multiply it. If they risk 30 points, they target 2× risk = 60 points above entry for a 1:2 ratio, or 3× risk = 90 points for a 1:3 ratio.
This is simple and it ensures good risk-reward. Cons: price might not cooperate at that exact level.
Best Practice: Combine Methods
Use multiple methods. If your Fibonacci target is 4,250p, and your measured move target is also around 4,250p, and that's where previous resistance is, then you have three reasons to target 4,250p. That's a high-conviction target.
Common Risk-Reward Mistakes
Mistake 1: Accepting Low Risk-Reward Just to Trade
You see a setup and you really want to trade it. But when you calculate the risk-reward, it's only 1:1. So you trade it anyway. Over 100 trades, this kills you. Better to pass on some setups and only trade the ones with good R:R. Quality over quantity, always.
Mistake 2: Setting Targets Too Close
You buy at 500p, stop at 490p (10 points risk), and you think "I'll target 505p to lock in quick profits." That's only 1:1.5 ratio. You're leaving money on the table. Let your winners run. Set targets based on technical levels, not on arbitrary profit taking.
Mistake 3: Ignoring Liquidity When Setting Targets
You calculate a beautiful 1:3 risk-reward target at 550p. But at 550p is a massive cluster of limit orders that will absorb your exit and leave you stuck. Always check: can I actually exit at my target? If there's no liquidity, move your target to a more liquid level.
Mistake 4: Moving Your Target Before You Hit It
You set a 1:2 target, but when price gets to your profit target, you think "I can hold for a bit more to get 1:3." Price reverses. You end up with a loss. Set your target, plan your exit, don't move it. If you want to hold longer, use scaling (exit half at 1:2, hold half for 1:3). But don't move the target.
Mistake 5: Not Taking Full Profits
The opposite problem: price hits your 1:2 target and you're excited. But you don't actually exit the full position. You get greedy, and price reverses. You end up with a small win instead of your planned 1:2 win. Discipline applies both ways—take profits when you're supposed to.
Summary
Risk-reward ratio is more important than your entry accuracy. A 50% win rate with 1:2 risk-reward beats a 70% win rate with 1:0.5 risk-reward every single time. Target for a minimum of 1:2 on all your trades. Set targets using technical levels, Fibonacci, or measured moves—not arbitrary profit targets. Even if your win rate is below 50%, good risk-reward can make you profitable. This is the foundation of professional trading mathematics.